Yunomi Pincushion
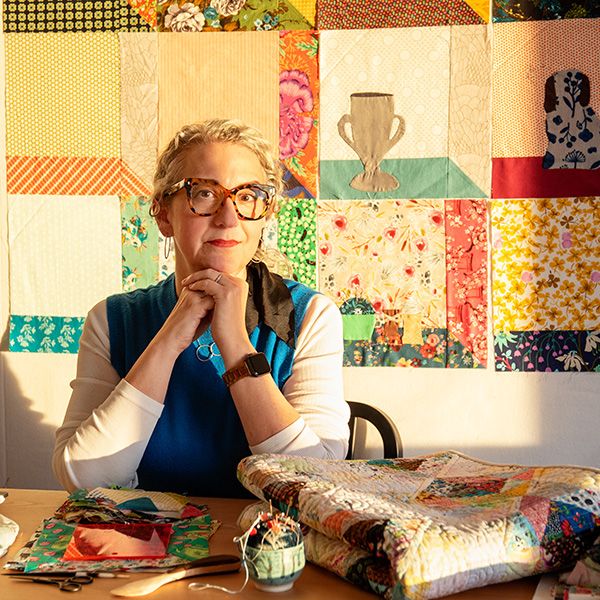
Blair Stocker/Wise Craft Handmade
00
DAYS
00
HOURS
00
MINS
00
SECS
Stay Tuned!
This event isn't live yet, but here are some options whilst you wait:
1. Get the VIP Pass - which gives you lifetime access to all the workshop presentations, as well as the bonuses generously provided by the artists.
2. Check out the Schedule Page - to see what presentations are available for viewing. Each one is available for 24 hours after it goes live.
3. Visit the Facebook Group and join the conversation
Get the VIP PassBlair will walk you through the steps to make a bespoke pincushion reminiscent of the Japanese Yunomi teacup (your favorite, every day, perfect-to-hold cup). We will embroider the top of the pincushion using the vintage embroidery technique of Chicken Scratch. Suitable for beginners and seasoned stitchers, this small project is likely to become a treasured sewing tool.
Materials
-
One approximately 10" x 10" piece of gingham fabric in quilting cotton or linen. *Note–The diameter of the embroidered top should be approximately twice the size of the diameter of the cup’s opening. For instance, a 2" diameter cup will require a 4" pincushion top. Keep the panel of fabric large enough to fit comfortably inside your embroidery hoop until it is completely embroidered. (See additional note below.)
-
A small cup suitable for a pincushion top (teacup, tiny bowl or jar, etc)
-
A few colors of 6-strand embroidery floss to coordinate with the gingham
-
Template of stitch pattern (following)
-
Ruler or tape measure
-
Pencil to trace circle
-
A drawing compass or something round and close in size to what you the size circle you need
-
Fabric marking pen (Blair uses a Frixion pen).
-
6" embroidery hoop
-
Size 3 or similar embroidery needle
-
Fabric scissors or pinking shears
-
Iron and ironing surface
-
A bit of Polyfill or similar for stuffing the pincushion top
-
Thread snips (optional)
-
E6000 glue to hold your pincushion top inside base securely.
A note on gingham size - It is best if the individual gingham squares on your fabric measure ¼" sq. This is a fairly standard size in gingham. Using larger or smaller sized squares will not give you the best result for this project. You can try those if you plan to use this embroidery pattern for another project. It’s all about experimenting!
00
DAYS
00
HOURS
00
MINS
00
SECS
Watch this video for free for 24 hours
Need more time? Get lifetime access to this workshop demonstration with the VIP PASS with EXCLUSIVE BONUSES
GET THE VIP PASS >Blair Stocker
Blair Stocker is the quilt designer, author, and educator behind Wise Craft Handmade. With a background in apparel design and fashion merchandising, she brings an eye for color, pattern, and creative reuse to everything she teaches. In addition to her scrappy, color value quilting designs, Blair has become known for reviving Chicken Scratch embroidery, a Depression-era gingham technique she reimagines through playful color, modern grids, and accessible stitch patterns for today’s makers. This technique allows hand stitchers of all levels to slow down, experiment, and discover how simple hand stitches can turn everyday cloth into personal, meaningful textile art.